หน่วยที่ 4 ส่วนประกอบของเมนบอร์ด
จัดทำโดย นายจักรพันธ์ มีสกุลวงศ์ 6031280053
หน่วยที่ 4 ส่วนประกอบของเมนบอร์ด

คุณสมบัติสำคัญ
- Supports AMD Ryzen™ & 7th Generation A-series / Athlon™ Processors
- Dual Channel Non-ECC Unbuffered DDR4, 4 DIMMs
- Fast 2 USB 3.1 Gen 2 with USB Type-A
- 2-Way CrossFire™ Multi-Graphics Support with Ultra Durable™ Metal Shielding over PCIe Slots
- Ultra-Fast PCIe Gen3 x4 M.2 with PCIe NVMe & SATA mode support
- ALC1220 120dB SNR HD Audio with Smart Headphone Amp
- Realtek® Gigabit LAN with cFosSpeed Internet Accelerator Software
- USB DAC-UP 2 & 2 Front USB 3.0 Ports with Adjustable Voltage
- RGB FUSION with Multi-Zone LED Light Show design
- Swappable Overlay for Accent LED
- Smart Fan 5 features 6 Temperature Sensors and 5 Hybrid Fan Headers
- GIGABYTE™ UEFI DualBIOS™
- APP Center Including EasyTune™ and Cloud Station™ Utilities
ผังส่วนประกอบของเมนบอร์ด

คุณลักษณะพิเศษ
-
ProcessorAM4 Socket:
- AMD Ryzen™ processor
- AMD 7th Generation A-series/ Athlon™ processor
-
Chipset
- AMD B350
-
Memory
- 4 x DDR4 DIMM sockets supporting up to 64 GB of system memory
* Due to a Windows 32-bit operating system limitation, when more than 4 GB of physical memory is installed, the actual memory size displayed will be less than the size of the physical memory installed. - Dual channel memory architecture
- Support for DDR4 3200(O.C.)/2933(O.C.)/2667*/2400/2133 MHz memory modules
* Support for higher than DDR4 2667 MHz may vary by CPU. - Support for ECC Un-buffered DIMM 1Rx8/2Rx8 memory modules (operate in non-ECC mode)
- Support for non-ECC Un-buffered DIMM 1Rx8/2Rx8/1Rx16 memory modules
- Support for Extreme Memory Profile (XMP) memory modules
- 4 x DDR4 DIMM sockets supporting up to 64 GB of system memory
-
Onboard GraphicsIntegrated Graphics Processor:
- 1 x DVI-D port, supporting a maximum resolution of 1920x1200@60 Hz
* The DVI-D port does not support D-Sub connection by adapter. - 1 x HDMI port, supporting a maximum resolution of 4096x2160@24 Hz
* Support for HDMI 1.4 version.
* Actual support may vary by CPU. - 1 x DVI-D port, supporting a maximum resolution of 1920x1200@60 Hz
-
Audio
- Realtek® ALC1220 codec
- High Definition Audio
- 2/4/5.1/7.1-channel
- Support for S/PDIF Out
-
LAN
- Realtek® GbE LAN chip (10/100/1000 Mbit)
-
Expansion Slots
- 1 x PCI Express x16 slot, running at x16 (PCIEX16)
* For optimum performance, if only one PCI Express graphics card is to be installed, be sure to install it in the PCIEX16 slot.
* Actual support may vary by CPU.
(The PCIEX16 slot conforms to PCI Express 3.0 standard.) - 1 x PCI Express x16 slot, running at x4 (PCIEX4)
* The PCIEX4 slot shares bandwidth with the PCIEX1_2 and PCIEX1_3 slots. The PCIEX4 slot operates at up to x2 mode when the PCIEX1_2/PCIEX1_3 slot is populated. The PCIEX4 slot operates at up to x4 mode when both of the PCIEX1_2 and PCIEX1_3 slots are empty.
* Actual support may vary by CPU. - 1 x PCI Express x16 slot, running at x1 (PCIEX1_3)
- 2 x PCI Express x1 slots
(The PCIEX4 and PCI Express x1 slots conform to PCI Express 2.0 standard.)
- 1 x PCI Express x16 slot, running at x16 (PCIEX16)
แผงขยายระบบด้านหลัง Back Panel

-
USB
- 2 x USB 3.1 Gen 2 Type-A ports (red) on the back panel
- 2 x USB 3.1 Gen 1 ports (available through the internal USB header)
- 5 x USB 2.0/1.1 ports (1 port on the back panel, 4 ports available through the internal USB headers)
CPU:- 4 x USB 3.1 Gen 1 ports on the back panel
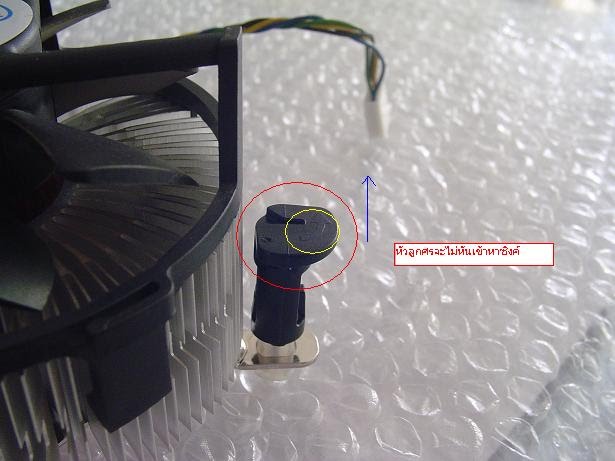
วิดีโอเพื่อเรียนรู้วิธีติดตั้ง CPU และ Heat sink
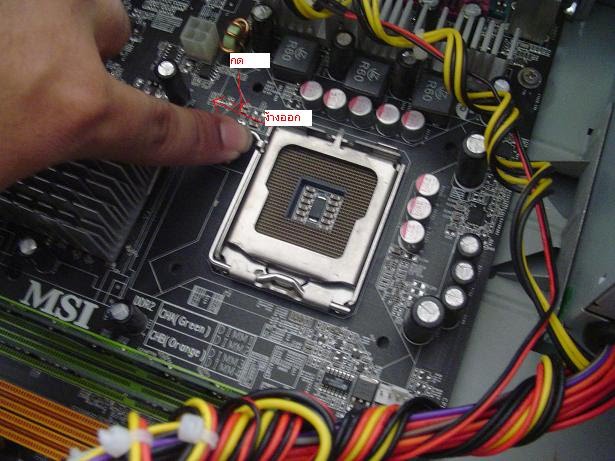
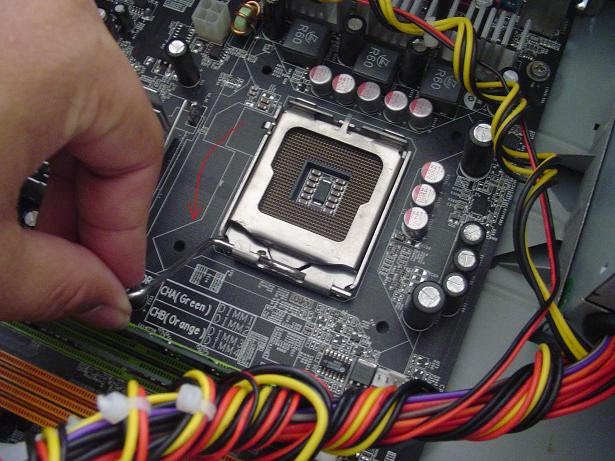
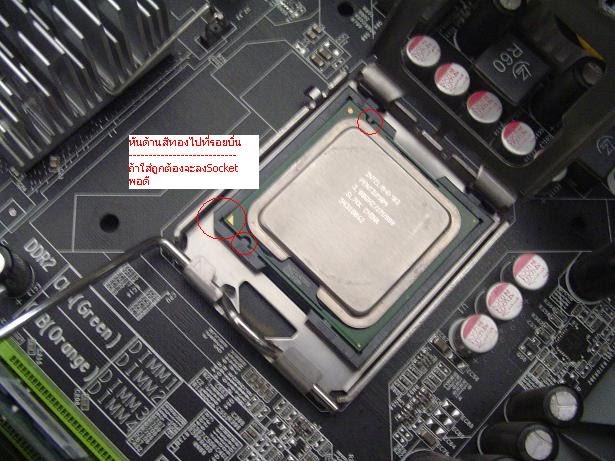
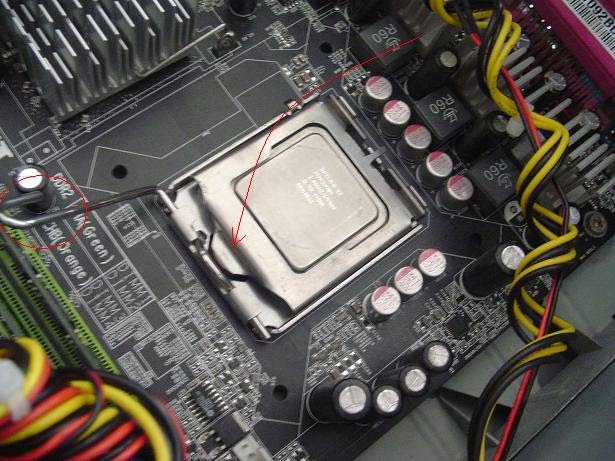
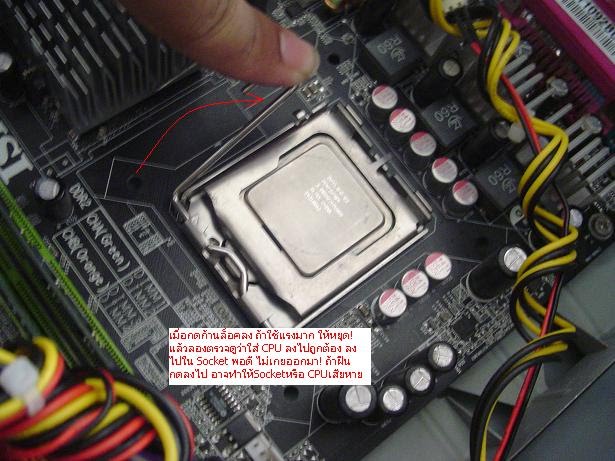
ขั้นตอนการติดตั้ง CPU
เริ่มจาก กดสลักลง ดันออกข้าง มันจะดีดขึ้นมาได้แล้วยกขึ้น ดังภาพ